“OPTICAL ILLUSION” (300 POINTS)
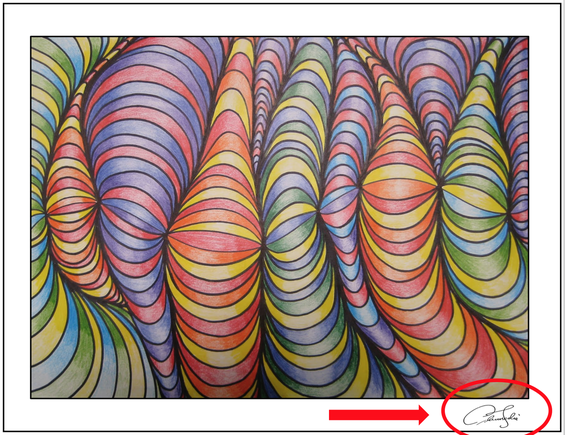
An abstract artwork that creates a 3D illusion. Students will use contour lines and gradients to create a 3D illusion of tubes.
SUPPLIES NEEDED:
12''x18'' inch drawing paper, ruler, pencil, thin black sharpie, colored pencils.
SUPPLIES CAN BE REPLACED WITH:
PAPER : NO SMALLER THAN 8.5'' X 11''
BLACK SHARPIE: BLACK MARKER OR BLACK PEN
COLORED PENCILS: WATERCOLOR PAINT, CRAYON, PENCIL
RUBRIC:
___/ 80 pts Use of Elements/ Principles of Art & Design: Do your lines curve so that you create an optical illusion or sense of space? Do your colors range in value from dark on the outsides to light in the center of each section?
____/ 80 pts Creativity / Originality: Did you explore several color schemes before selecting one; generating many ideas; tried unusual combinations or changes on several ideas?
____/ 70 pts Craftsmanship/ Skill : Did you use the entire space of the paper? Is your artwork beautiful and patiently done? Did you fill the entire space with pattern? Is your project as good as you could make it?
___/ 70 Effort/ Participation: Were you productive? Did you use all of your time in class to work on your project? Did you give effort far beyond what was required? Did you take pride in your work?
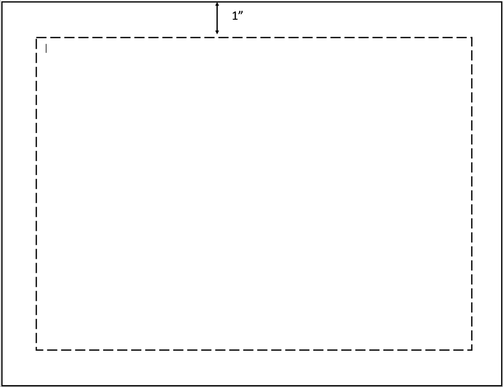
STEP #1 (Day 1) - BORDER. Draw a 1'' border all the way around the paper. This area will remain white. Do not draw in the border.
An abstract artwork that creates a 3D illusion. Students will use contour lines and gradients to create a 3D illusion of tubes.
SUPPLIES NEEDED:
12''x18'' inch drawing paper, ruler, pencil, thin black sharpie, colored pencils.
SUPPLIES CAN BE REPLACED WITH:
PAPER : NO SMALLER THAN 8.5'' X 11''
BLACK SHARPIE: BLACK MARKER OR BLACK PEN
COLORED PENCILS: WATERCOLOR PAINT, CRAYON, PENCIL
RUBRIC:
___/ 80 pts Use of Elements/ Principles of Art & Design: Do your lines curve so that you create an optical illusion or sense of space? Do your colors range in value from dark on the outsides to light in the center of each section?
____/ 80 pts Creativity / Originality: Did you explore several color schemes before selecting one; generating many ideas; tried unusual combinations or changes on several ideas?
____/ 70 pts Craftsmanship/ Skill : Did you use the entire space of the paper? Is your artwork beautiful and patiently done? Did you fill the entire space with pattern? Is your project as good as you could make it?
___/ 70 Effort/ Participation: Were you productive? Did you use all of your time in class to work on your project? Did you give effort far beyond what was required? Did you take pride in your work?
STEP #1 (Day 1) - BORDER. Draw a 1'' border all the way around the paper. This area will remain white. Do not draw in the border.
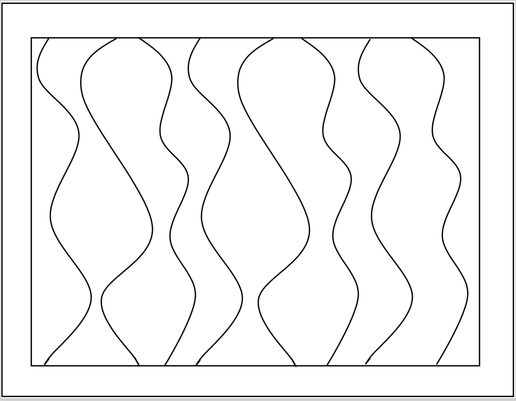
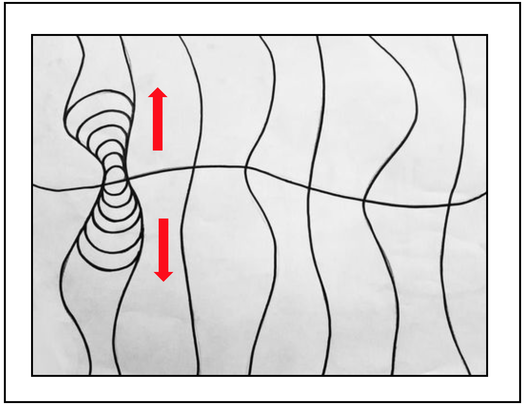
STEP #2 (Day 1) - 8 VERTICAL LINES. Draw 8 vertical lines arcoss the paper. Do your best to distribute the space evenly. Make some vertical lines wavier than others. Don't make them too wavy!
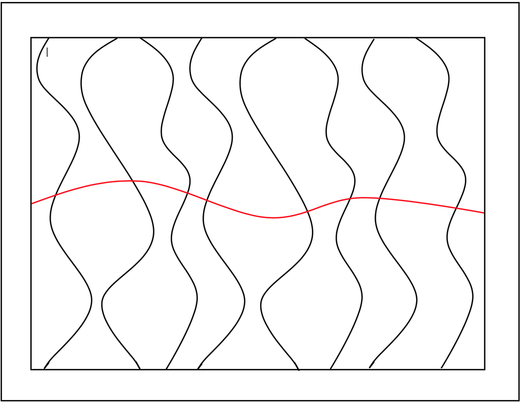
STEP #3 (Day 1) - HORIZONTAL LINE. Draw 1 loose horizontal wave across the center of the paper from left to right. Do not draw it too curvy.
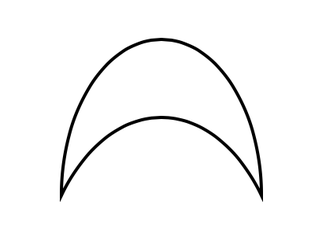
STEP #4 (Day 1) - PRACTICE CRESCENT MOONS ON PRACTICE SHEEET In each vertical section you will draw curves that look like crescent moons. The ones above the horizontal wave will curve upwards and the ones below the horizontal wave will curve downwards. If they are not curved enough you will not create the 3d optical illusion and it will look flat. PLEASE PRACTICE THESE FIRST ON THE PRACTICE SHEET. COMPLETE THE FRONT AND BACK. **You will not get this on your first try. Tip** If you use wooden pencil it will be easier because the tip is thicker and you will have more control versus a mechanical pencil.
PRACTICE SHEET
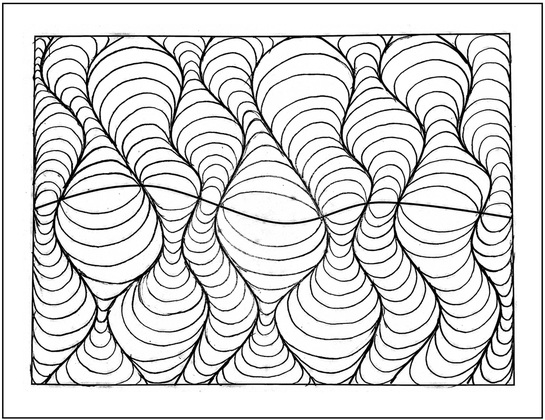
STEP #5 (Day 2 and 3) - FILL IN FINAL DRAWING PAPER. Once you have completed the front and back of the practice sheet you should be ready to draw your crescent moons on the final drawing paper. Please do this carefully in pencil. Avoid erasing because previous marks will show through the colored pencil later. If you are not ready complete another practice sheet. After you have filled in all the vertical sections with the crescent moons in pencil you will trace over all your pencil lines (border, vertical waves, horizontal wave, crescent moons) with a thin Sharpie.
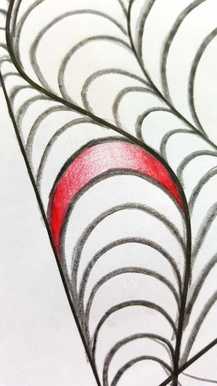
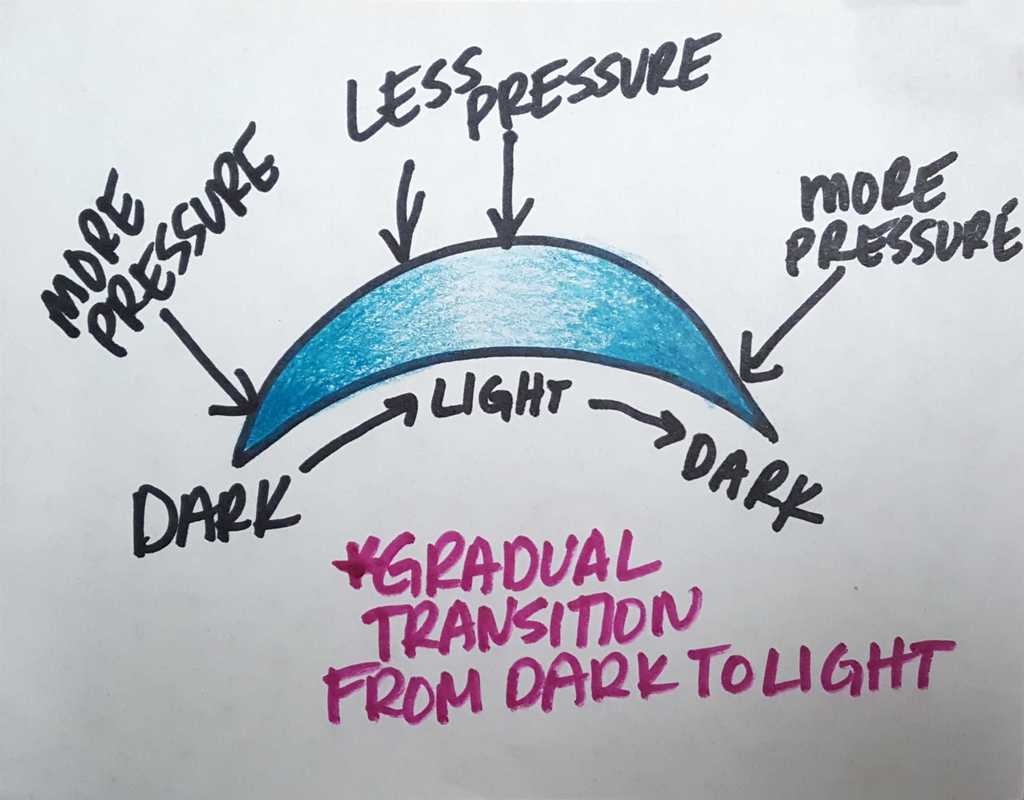
STEP #6 (Day 4 -18) - GRADIENTS. Color each crescent moon section with a gradating color from light to dark. Dark on the sides and light in the middle. Light values tend to come forward. Dark values tend to go backwards. By keeping the middle light we are creating the rounding effect of the tubes.
COLOR CHOICE & PLANNING keep in mind the color schemes we learned about. Choose your colors carefully. Organize where you will place your colors and what pattern you will creating before coloring.
COLOR CHOICE & PLANNING keep in mind the color schemes we learned about. Choose your colors carefully. Organize where you will place your colors and what pattern you will creating before coloring.
STEP #7 - SIGNATURE. When you are finished you will sign the bottom right hand corner with your signature in thin sharpie.

STEP #8 - PRINT NAME AND PERIOD # ON BACK.

| optical_desing_project.docx |
