GLAZING
1. Clean pot:
Wipe any little fired clay crumbs out of and off of your piece. Stuck-on bits can usually be scraped off with
a fingernail or tool.
2. Make sure project is dry:
If your pot is wet from washing off dust or glaze, glaze will not stick to it - let it dry for a day before trying
again.
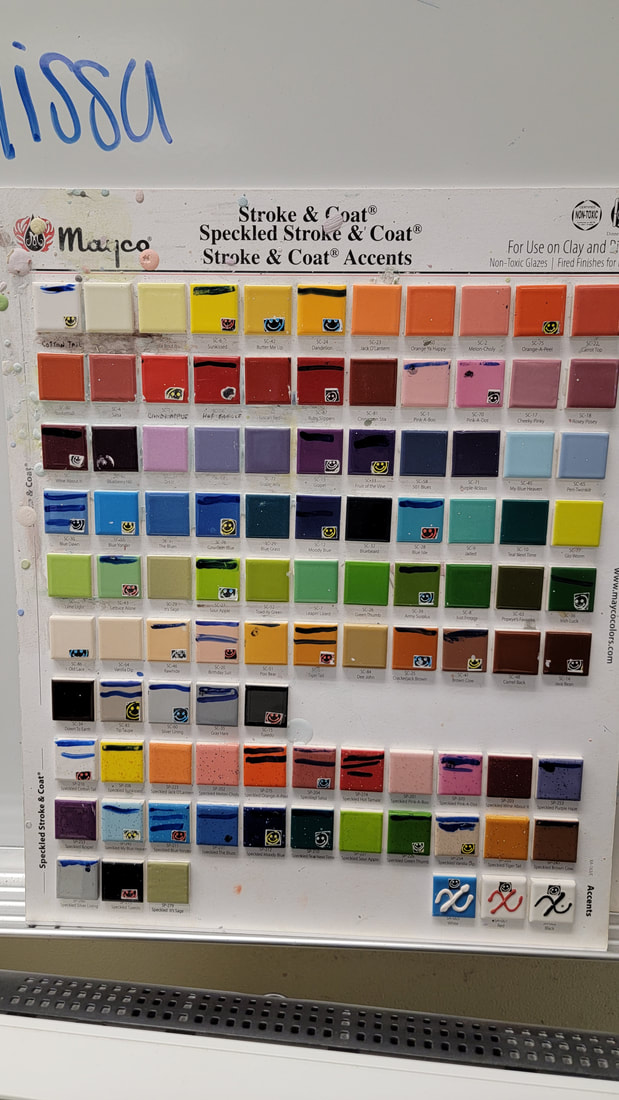
3. Choose glaze:
Choose colors from the glaze chart. Mrs Zotos will fill your paint tray with chosen colors.
4. Mix glaze:
Most glaze materials are insoluble and settle to the bottom of the bottle in a very short time. If you do not
mix the glazes properly, you will ruin your piece. Use a brush mix glaze up until the glaze is a thick creamy liquid.
5. Apply glaze:
- Apply 3 thin layers of glaze
-Allow layers of glaze to dry before adding a new layer or different color.
-Rinse/clean brushes every time you use a new color.
-Avoid contamination of colors. Constantly clean brushes prior to dipping into new color.
-It is usually better to glaze the inside of a piece before glazing the outside.
-Make sure there are no bare spots, especially on rims or inside on projects.
-Handle with care! Do not touch any glazed areas that are still wet. Glazes can brush or chip off easily
when dry, too.
- Do not apply glaze to the bottom of your piece. It will stick to the kiln shelf!
6. Monitors will be responsible for washing all brushes, picking up the clear glaze and scratch paper to protect the table from glaze.
Glaze thickness:
The combined thickness of all glaze layers (if more than one) should be 8 – 10 sheets of paper thick
(between 1/2 and 1mm, depending on the glaze). Your bisque-fired piece is like a sponge: the drier or
thicker it is, the more moisture it can absorb and the more glaze can stick to it.
glaze applied too thickly will run off the pot and weld your piece to the kiln shelf, ruining your piece.
Wipe any little fired clay crumbs out of and off of your piece. Stuck-on bits can usually be scraped off with
a fingernail or tool.
2. Make sure project is dry:
If your pot is wet from washing off dust or glaze, glaze will not stick to it - let it dry for a day before trying
again.
3. Choose glaze:
Choose colors from the glaze chart. Mrs Zotos will fill your paint tray with chosen colors.
4. Mix glaze:
Most glaze materials are insoluble and settle to the bottom of the bottle in a very short time. If you do not
mix the glazes properly, you will ruin your piece. Use a brush mix glaze up until the glaze is a thick creamy liquid.
5. Apply glaze:
- Apply 3 thin layers of glaze
-Allow layers of glaze to dry before adding a new layer or different color.
-Rinse/clean brushes every time you use a new color.
-Avoid contamination of colors. Constantly clean brushes prior to dipping into new color.
-It is usually better to glaze the inside of a piece before glazing the outside.
-Make sure there are no bare spots, especially on rims or inside on projects.
-Handle with care! Do not touch any glazed areas that are still wet. Glazes can brush or chip off easily
when dry, too.
- Do not apply glaze to the bottom of your piece. It will stick to the kiln shelf!
6. Monitors will be responsible for washing all brushes, picking up the clear glaze and scratch paper to protect the table from glaze.
Glaze thickness:
The combined thickness of all glaze layers (if more than one) should be 8 – 10 sheets of paper thick
(between 1/2 and 1mm, depending on the glaze). Your bisque-fired piece is like a sponge: the drier or
thicker it is, the more moisture it can absorb and the more glaze can stick to it.
glaze applied too thickly will run off the pot and weld your piece to the kiln shelf, ruining your piece.
|

|
